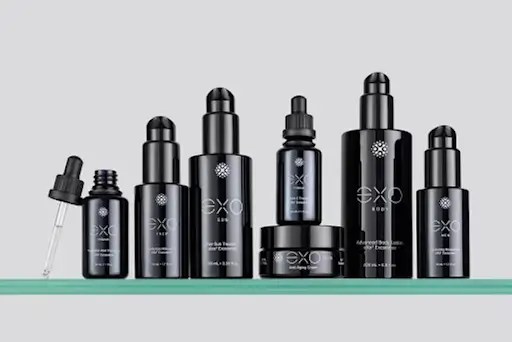
Isn’t it just frustrating trying to capture the perfect photos of reflective products, only to end up with glares, harsh reflections, or even your entire setup staring back at you? Those unwanted reflections in photos can obscure important details, distort the true colors, and make the product look less appealing. As a result, potential customers may hesitate, unsure about making a purchase.
But don’t worry—photographing shiny products doesn’t have to feel like an uphill battle. In this blog, we’ll share simple yet powerful techniques to make those reflective surfaces work for you, so you can shoot like a pro—creating crisp, flawless images that highlight your product in its best light.
Understanding Reflective Surfaces
Let’s first understand what reflective surfaces are, because knowing what you’re working with is half the battle in photography with reflections. Reflective surfaces are materials that bounce back light, creating reflections that can be challenging to control in photography. Their characteristics, such as gloss, texture, transparency, and how they reflect or refract light, require careful handling to achieve the perfect shot without unwanted glare or distortion.
Here are a few types of reflective surfaces:
-
Highly reflective metals like chrome, stainless steel, or gold can act almost like mirrors, reflecting your camera, lighting, and anything else around it.
-
Glass surfaces, like bottles, wine glasses or eyeglasses, reflect and refract light, creating unexpected distortions or double reflections in photos.
-
Glossy plastics are commonly seen in cosmetic packaging or electronics and are notorious for showing fingerprints and uneven reflections.
-
Liquids, such as perfumes in clear bottles or oil-based products, add another layer of complexity, often creating distorted reflections or challenging light spots.
Importance of Knowing the Material When Photographing
Why does this matter? Because each product has its own unique surface, and understanding that is key to getting the perfect shot. A softbox that works for a metal watch might cause undesirable hot spots on a glass perfume bottle. Knowing the material helps you determine the right lighting angle, modifiers, and even the background, ensuring that each product gets the attention it deserves.
Master the surface; you’re one step closer to mastering photography with reflections.
Essential Equipment for Shooting Reflective Products
To take stunning, reflection-free photos, it’s crucial to have the right equipment. Therefore, what you need for a reflective photoshoot is:
Lenses
A macro lens is often ideal for capturing fine details of small, shiny objects like jewelry or perfume bottles. Macro lenses allow you to shoot extremely close to your subject with excellent sharpness, revealing textures, engravings, and fine craftsmanship. It is especially important when your product is meant to highlight luxury or quality.
On the other hand, a prime lens is perfect for isolating the product from its background. This helps reduce distracting reflections by allowing a shallow depth of field, making the product pop while softening everything around it.
Additionally, lenses with high-quality multi-coating can reduce internal reflections and minimize lens flare, vital when shooting with complex lighting setups.
Lighting Equipment
Reflective products demand controlled lighting. A combination of continuous LED panels or softbox strobes provides consistent, adjustable light that avoids harsh reflections. Soft light sources are key—direct flashes or bare bulbs will bounce off shiny surfaces and create hotspots or blown-out areas.
Light tents or diffusion boxes are also commonly used to soften the light and provide even illumination around reflective products. These tools help eliminate harsh shadows and provide a clean, uniform look that enhances the shape and shine of the item without overwhelming it.
Tripod
When it comes to reflective product photography, a tripod is not optional—it’s essential. Stability is everything when capturing sharp, detailed images of highly reflective items like glass, chrome, or polished metal. Even the slightest movement from handheld shooting can cause blur, misalignment, or inconsistent framing, especially when working with high-resolution cameras and studio lighting setups.
A high-quality tripod allows you to maintain consistent composition across multiple shots, which is particularly useful for commercial photography, e-commerce listings, or shooting a product from various angles. It also frees up your hands to adjust lights, tweak product placement, or use remote triggers without needing to constantly reframe.
Camera
A high-quality camera with manual settings is essential for reflective photoshoots. While any DSLR or mirrorless camera can work, having full control over settings like aperture, shutter speed, and ISO is important to fine-tune the shot.
Camera Settings for Perfect Reflection Shots
Here’s how to dial in your camera like a pro when dealing with product photography with reflections:
ISO and Shutter Speed
Keep your ISO as low as possible—typically around 100 or 200—to avoid grain, especially since reflective surfaces can exaggerate digital noise. Shiny products reflect every imperfection, and noise is one of them.
For shutter speed, you’ll need to adjust based on your lighting setup. If you’re using a tripod (which you should be), you can afford slower shutter speeds like 1/30 or even lower, especially in soft lighting.
Aperture
A mid-range aperture—f/8 to f/11—usually works best for reflective product photography. It gives you a balanced depth of field while maintaining sharpness. While wider apertures (like f/2.8) create a beautifully shallow depth of field that helps highlight specific product details and blur distracting backgrounds. On the other hand, very narrow apertures (like f/22) increase sharpness across the frame but may introduce softness due to diffraction. Use test shots to find the perfect spot for your specific product.
White Balance
Reflective surfaces can easily pick up color casts from the background, lighting, or even nearby walls. That’s why it’s essential to manually set your white balance or use a custom white balance card. Avoid relying on auto white balance—it can swing between too warm and too cool depending on reflections in your scene. A properly set white balance ensures your metallics look silver (not blue or yellow) and glass stays crisp.
Manual Focus
Reflective surfaces can trick your camera’s autofocus system by bouncing light unpredictably, causing it to lock onto a reflection instead of the product itself. Use manual focus to take control. Zoom in using live view mode and adjust your focus until the product edges are razor sharp. This is especially crucial for watches, glass, and jewelry product photography, where every minor detail matters.
Lighting Techniques to Eliminate Unwanted Reflections
Lighting Setup
When doing reflective photoshoots, ditch the idea of using one direct front-facing light. Instead, focus on indirect or diffused lighting setups. A common approach is the “tent” or “cocoon” setup, where softboxes, diffusers, or white reflectors surround the product on all sides. It reduces hard shadows and helps wrap the light smoothly around your subject.
Another pro move? Use black flags or foam boards to block unwanted reflections. These help shape the light and create defined edges without bouncing every source around.
Backlighting
Backlighting is the go-to technique for makeup and beauty product photography. It helps highlight the fine details and textures of beauty products, like the curves of a lipstick or the embossing on a cosmetic packaging, without distractions from reflections or uneven lighting.
Instead of lighting from the front, place your key light behind the product, often with a diffuser in between. This trick adds a soft glow around the product, eliminates front-facing reflections, and gives transparent materials a clean, vibrant edge.
To make backlighting even more effective:
-
Place a white background behind your diffuser for a blown-out clean look.
-
Add subtle side fill lights to bring back the product shape without ruining the reflection.
Lighting Angles
With reflective items, angle is everything. Even if you’re using the best lights, placing them at the wrong angle will bounce glare right into your lens.
Follow the “angle of incidence = angle of reflection” rule — if your light hits the product at a 45° angle, it’ll bounce off at the same angle. So, place your lights and camera in such a way that reflections bounce away from the lens, not into it.
Also helpful:
-
Position lights above and to the sides rather than straight on.
-
Tilt the product slightly to redirect reflections downward or outward.
Pro tip: Use a polarizing filter to further reduce reflections in photos — it won’t solve everything, but it helps control hotspots on curved surfaces.
Light Modifiers
Modifiers are your best friends when controlling reflections in photos. Use these modifiers intentionally:
-
Diffusers: Soften light and create even coverage. Great for reducing sharp reflections on metals or glass.
-
Scrims: These are large translucent materials placed between the light and subject. They’re ideal for glass or mirrored products where full diffusion is needed.
-
Reflectors (white or silver): Bounce controlled light back into shadow areas without creating new reflections.
-
Black cards (“negative fill”): Create contrast and add shape to shiny products by blocking ambient light. These can help carve out edges and stop over-illumination.
If you’re photographing cylindrical or curved surfaces, large diffused light sources placed at an angle, not directly in front, will minimize mirror-like reflections in photos.
The Role of Backgrounds and Surfaces in Reflection Photography
Choosing the Right Background
A carefully selected background ensures that the focus remains on the product while reducing the risk of visual noise in reflections. For most reflective subjects, clean, neutral-toned backgrounds—such as white, gray, or deep black—are preferred. These tones provide controlled contrast and lend a commercial polish to the composition. Paper rolls, studio cycloramas, or fabric backdrops with a matte finish are ideal, as they prevent creases, hotspots, and visual distractions that may show up on the reflective surface.
Non-reflective Surfaces for Shooting
The shooting surface should be equally considered. Glossy or polished tabletops often introduce unwanted highlights or visual clutter beneath the product. To avoid this, opt for non-reflective materials such as matte acrylic, textured foam board, or treated wooden panels. These materials absorb stray light and ensure that the base does not interfere with the lighting design or show up as a secondary reflection.
Using Editing Software to Enhance Reflection Photography
Even with perfect lighting and camera settings, reflections in photos may be visible to some level, requiring post-production to refine the final image. Editing software corrects exposure and color issues and helps eliminate unwanted reflections, polish surfaces, and, when needed, simulate idealized reflections for a commercial look.
Post-Processing Tools
Popular photo-editing software like Adobe Photoshop and Lightroom offer a wide range of tools tailored for cleaning up, enhancing, or manipulating reflective product photos. Below is a breakdown of essential editing tools and how each contributes to better reflection photography results.
Essential Editing Tools for Reflection Photography
|
Tool |
Purpose |
|
Spot Healing Brush |
Quickly removes small imperfections like dust, glare spots, or fingerprints |
|
Clone Stamp |
Replaces larger or more detailed areas with cleaner textures |
|
Content-Aware Fill |
Fills selected areas intelligently to match the surrounding context |
|
Adjustment Brush |
Targets specific areas for brightness, contrast, or clarity adjustments |
|
Dodge & Burn |
Enhances highlights or shadows for better product definition |
|
Gradient Tool |
Balances light fall-off or adds subtle background effects |
Clipping Path and Reflection Removal
When you’re shooting for eCommerce or commercial use, your product images often need a super clean look—usually on a white or transparent background. That’s where clipping paths come in. This technique allows you to neatly cut out the product from its background so there’s no clutter, weird shadows, or color reflections messing with the image.
Sometimes, shoots pick up unwanted details—like light stands, cameras, or reflections from the room. These can be removed during editing by masking them out or replacing them with neutral tones. And if a reflection looks off or uneven, you can even recreate it by duplicating and flipping parts of the image to rebuild symmetry or consistency.
Creating Artificial Reflections
When natural reflections are hard to control or don’t look visually appealing, editors may digitally create artificial reflections. This involves duplicating the product image, flipping it vertically, adjusting opacity, and applying a gradient fade or blur to simulate depth and realism. Artificial reflections in photos work well in high-end commercial shoots where stylized presentation matters more than authenticity.
Common Mistakes to Avoid in Reflective Product Photography
Let’s go over some mistakes to watch out for, so you can avoid them in your product photography with reflections.
1. Overcompensating with Lighting
It’s easy to think that more light is better when photographing reflective surfaces, but over-lighting can lead to harsh glares and washed-out areas. Instead of blasting your subject with light, focus on using controlled, diffused lighting.
2. Not Considering the Product’s Scale
When photographing a reflective product, photographers sometimes neglect to consider the scale and proportion of the product in relation to the frame. Shooting tiny products like jewelry or watches with the same technique as large products, like vases or electronics, may result in an unflattering image.
3. Failing to Maintain Consistent Color Accuracy
Color is a big issue when photographing reflective products. Because they reflect so much light, they often pick up unwanted colors from their surroundings. Failing to control this can lead to colors that don’t match the actual product or look unnatural.
4. Forgetting About Post-Processing Limitations
Many photographers believe they can “fix” everything in post-processing, but there are limits to what editing software can correct. Unfixable issues, like poor exposure or improper focus, can’t always be rescued later. It’s essential to get the fundamentals of your shot right in-camera — lighting, composition, and focus — so that you don’t find yourself spending hours correcting things that could have been avoided during the shoot.
5. Not Testing for Reflections Beforehand
Sometimes, photographers get so excited to start shooting that they don’t take a moment to check how reflections in photos behave on their product before setting up the shot. A few quick adjustments during the setup phase can prevent those last-minute surprises of unwanted reflections sneaking into the final image.
Tips for Shooting Specific Reflective Products
Here are some pro tips for shooting specific reflective products:
|
Product Type |
Background |
Lighting |
Focus/Angles |
Other Tips |
|
Jewelry and Watches |
Neutral, non-reflective (e.g., black velvet) |
Soft, diffused lighting (like a ring light or softbox) to avoid harsh reflections |
Use macro lens for close-ups and fine details |
Keep the surface clean; shoot from various angles to find the best shot |
|
Glassware and Bottles |
Simple black or white background |
Backlighting to highlight the shape without reflecting camera or light gear |
Shoot at a 45-degree angle to minimize reflections |
Use a tripod for stability and to ensure sharpness in the reflection |
|
Metallic Products |
Matte or neutral backgrounds |
Use angled light sources to avoid harsh reflections and maintain product clarity |
Focus on the center of the product for best detail |
Consider using a polarizing filter to reduce reflections on shiny surfaces |
|
Mirrored Surfaces |
Dark or black background |
Place lights at strategic angles to avoid reflections in the mirror |
Focus on specific sections of the product to maintain sharpness |
Clean the mirror surface thoroughly to avoid dust or fingerprints in the shot |
The Bottom Line
Reflective photoshoot can definitely feel tricky, but it’s totally manageable with the right approach. With the tips you’ve picked up here, you’ve got everything you need to turn those high-shine surfaces into high-impact photos.
So go ahead, take on that next reflective product—you’re more than ready.


